|
Windhammer, Copyright Wayne Densley 2008 All Rights Reserved
|


 Windhammer is an interactive fantasy gamebook adventure and in the world that is about to unfold you are its hero. It is you who will decide how your journey progresses, and it will be you who will make choices and decisions that will determine your ultimate success. Within these pages you control your own destiny. Windhammer is a gamebook that has its own unique rules, and you will need to understand them prior to beginning your quest. These rules are outlined below. The following links will help you to find specific information if needed: Windhammer is an interactive fantasy gamebook adventure and in the world that is about to unfold you are its hero. It is you who will decide how your journey progresses, and it will be you who will make choices and decisions that will determine your ultimate success. Within these pages you control your own destiny. Windhammer is a gamebook that has its own unique rules, and you will need to understand them prior to beginning your quest. These rules are outlined below. The following links will help you to find specific information if needed:
To play Windhammer you will need;
- a pencil or pen,
- two six-sided dice,
- a printout of the character status and combat record sheet provided with this book. Please note that text versions of these sheets can be found here also.
Prior to commencing your journey you should read the directions and other information provided. Within the history of Stoneholme, and the circumstances of Halokim Vesh's recruitment to his quest, lies information that may help you on your journey. Subtle clues can be found throughout your quest, and the following will help you discover them.
Before beginning though, we should look first at what is a gamebook adventure. It is not a novel in the usual sense. It is a work of interactive fiction, a solo adventure that allows you to make choices as to how you wish to proceed within the story. You will combat those that stand in your way, collect new items and equipment as you travel, and ultimately win through to your quest's end.
To read Windhammer in the same way that you might read a normal book will make little sense. To play Windhammer begin by reading this page of instructions and then the background information describing the inhabitants of Arborell. Additional appendices have also been provided with more in-depth information if you wish to gain a deeper understanding of the long history of this turbulent world.
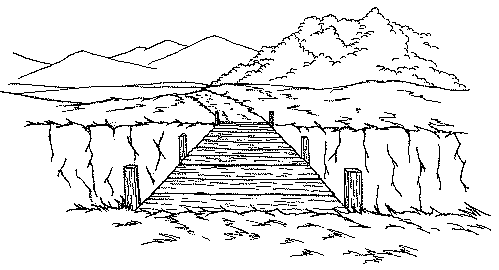
From there you commence your quest at the section entitled Maenum, and proceed on your journey according to the directions you encounter as you read the text. You will find that making a map of your progress whilst in Stoneholme will greatly assist you in finding your way through the many passages and halls of the fortress. A map will be especially useful if you wish to avoid traps on subsequent attempts to restore the Tellandra.


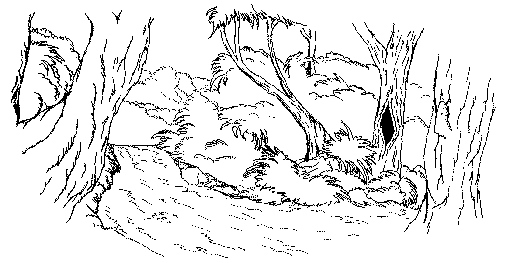
Deep within the subterranean labyrinths of the ancient mountain fortress of Stoneholme stands a pillar of stonewood known to the Dwarvendim of Arborell as the Tellandra. For more than a century it has been lost, hidden far from the sight of men by the minions of the Horde as they assail it in an effort to destroy its power. Until these last few days it has withstood the onslaught of the Hordim, and the greater strength of the Dragon Windhammer, but now it lies shattered. Whole, the Tellandra stood as the most powerful conduit of magic in the known world. Broken, its power ebbs like blood from an open wound, dispersing unseen into the darkness of Stoneholme's deepest chambers. With each passing day the powers of Magic and Lore weaken.
It is your quest to find the stonewood before its magic passes completely from the world. Once found it can be restored, and then, with its power renewed, the forces of chaos can be contained and destroyed. This is your task.

Before beginning your quest you will need to establish the strength and attributes of your character. This is done in the following way.
Unlike many other gamebook adventures, you do not roll dice to determine character values. In the Windhammer gamebook you are given 50 character points that must be spread amongst five core character attributes. In addition, you may also choose specific skill areas that you may use to enhance the effectiveness of your character. To give your character a greater chance of success there are also a number of talents that may be chosen as well. How these attributes, skill areas and talents are applied to your character is explained in the following text.

In this book can be found a Character Status Sheet. This sheet must be printed prior to commencing your adventure. It is on this sheet that all the activity of your quest is recorded, and upon which many of the decisions you must make will be based. The sheet requires that you record a number of facts about your character; specifically his strengths, attributes, endurance level, skill areas and chosen talents. This sheet is also used to record equipment carried, artifacts and other items found on the way, rations available, and the number of times you can use the uniquely Dwarvendim skill of the Shimmera. More can be found on the uses of the Shimmera further within this introductory section.
In developing your character the first thing that must be decided is the relative strength of your character's attributes. If you look at the character sheet you will find that there are five listed; Strength, Agility, Endurance, Luck and Intuition. Your character has 50 points that must be distributed amongst these attributes. You will notice that each attribute has a range of numbers given in brackets next to them. This is the minimum and maximum limits for points that can be ascribed to each. For example, the Strength attribute allows for a minimum of 5 points and a maximum of 11 character points. How strong you wish your character to be will be determined by the number of points you give him within this range. All fifty points must be used on these five attributes, but they must be spread within the limits given for each. Distribute these points carefully. It is not only strength and endurance that will see you to this adventure's end.
In determining how many points you will apply to each attribute the following information may prove useful.


How strong you are is the first quality to establish. This attribute allows you to place between 5 and 11 character points, and is your choice as to how strong you wish to make your character. This is your strength, and it will only change during the quest if you suffer severe injury. The text will tell you by how much you should reduce your strength attribute if you sustain such an injury. With rest injuries can be healed, and the text will give full instructions on how you should account for such changes.

The next attribute to determine is agility. You may allocate between 1 to 5 points to this attribute. You ability to move quickly, and undertake difficult physical tasks will be determined by the points you give here. You should consider carefully how many points you allocate to this attribute. As with strength, your agility will not change in the course of this adventure except if you are injured, or if you are encumbered in some way. If you are required to modify this attribute the text within the story will provide full instructions as to how these changes should be accounted for.

You may apply as many as 35 character points to your Endurance, but not less than 15. This amount is your maximum endurance point level and is recorded on your character sheet as your initial value. Except for one special circumstance it cannot be exceeded during the game. As you encounter the creatures of the Horde, or the even more lethal traps that litter the halls and secret places of Stoneholme, you will find your endurance points rising and falling as you are either injured, or take meals or sleep.
Your level of endurance determines how fit you are, and how well you are fairing in the face of the challenges of your quest. Should your endurance fall to zero then, unfortunately, you have died and your quest has ended. It will then be to your next life that you must look for greater success.
Once you have determined the number of points you are giving this attribute, record the amount also in the Endurance Points box on your character sheet.

Luck plays a large part in the success of any quest. In your journey through the pages of Windhammer you will find that luck will play a significant role in determining how easy or how difficult your road will be. You may give up to 5 character points to this attribute. This is your luck factor. It is constant and will not change whilst you are on your quest. A high luck score will make your survival easier, but not all the challenges you will face require it. As with all these attributes think carefully on how lucky you wish your character to be.

Not everything that you find within this adventure will be as it seems. Your quest will place before you circumstances that may appear straightforward, but will prove at best distractions, and at worst lethal challenges. It will be your intuition that will guide you and it should be considered carefully when distributing character points. You may apply up to 5 points to this attribute.

Once you have ascribed character points to each of these five attributes, and are happy with the choices you have made, you will need to return to the first two; Strength and Agility. Apart from their importance as individual attributes to your character, they also determine one very important aspect of your character's ability to succeed in this adventure; your Combat Value.
Add these two amounts together and place the total in the sub-total box of your character sheet. This is your character's initial Combat Value. It is a measure of your character's capacity to survive in the wilds of Arborell, and the cruel dominion that is now Stoneholme under the occupation of the Horde. Have no illusion about the dangers you will face on the quest you are about to undertake. If you are sighted by any creature of the Horde you will be attacked, and the combat will not end until one of you has fallen. There is no opportunity for escape. Survival will depend on how well you fight, and your Combat Value will determine this.
You will notice that both Armour bonuses and Skill/Talent bonuses also combine to make up your final Combat Value. For the moment leave these blank. Skill and Talent bonuses will be determined by your choices in the following sections of these instructions; any Armour bonuses will be determined in Section 1 of this gamebook.
In the next section you will need to pick both character skills and talents. Depending on what you choose there may be bonuses that can increase your fighting capabilities.


In the course of an adventurous life, Halokim Vesh has developed a range of survival skills that will be of great value to your quest. Below are six skill areas, all of which can help you on the hard road that will lead ultimately to the Tellandra. You may pick two of these skill areas to take with you on your travels. Read the information below and choose wisely. Once you have chosen the skills you believe will best serve you on this adventure, tick off the appropriate boxes on your Character Status sheet and adjust your character attributes to account for any bonuses that your choices may bring. Each of the six skill areas are described in full below.

A life spent in the wilds of Kalborea has finely honed your ability to live off the land, and move unnoticed through its differing terrains. The skill area of Bushcraft provides the skills of navigation, native food lore, weather lore, camping and woodcraft, an innate sense of direction, fire-making and camp cookery. Such skills can be extremely valuable as you travel the lands of Northern Kalborea. If you choose this skill area you may add an additional five points to your total endurance points. This is however, the only exception to the rule that your EP cannot increase beyond its initial level. Keep in mind though, that this skill area only has practical value whilst you are travelling to Stoneholme. If you find Stoneholme and enter its dark halls these skills may prove of lesser value.
Skill Bonus: Bushcraft increases initial Endurance by 5 points.

This skill area provides more than just proficiency in hunting. Within this skill area can be found animal knowledge and husbandry, tracking, hunting skills, an ability to sense ambush and keen vision. These skills allow you to find food and track possible enemies without falling victim to them. If you choose this skill area you may add one bonus character point to your Combat Value. Like Bushcraft, the Huntmastery skill is only of value whilst you are travelling the plains and forests of Kalborea. Once you enter Stoneholme these skills will prove of lesser value.
Skill Bonus: +1 to Combat Value.

Weaponmastery provides proficiency in all common weapons found in Arborell. Your life as a thief has tempered your combat skills to a point where you have proven yourself a formidable opponent, and if you choose this skill area you will be able to add one additional point to your Combat Value. This skill area cannot be chosen however, if you have already chosen Huntmastery. When choosing your character skills you cannot choose both Weaponmastery and Huntmastery. In this adventure it must be either one or the other.
Skill Bonus: +1 to Combat Value.

EarthMagic runs through the world of Arborell as a physical presence, one that can be harnessed by those who understand its Lore. As a novice at the Temple of the Suns in Das Frontiere you were only beginning to understand the power of EarthMagic when the Temple's doors were closed, and you were thrown into the street. (More can be found on this in the text of this book and in the Windhammer companion novella - The Inquisitor's Lament.)
At this time you possess latent powers, untrained and unfocused, that will help you on this quest. Such powers include an innate ability to sense the proximity of EarthMagic, and an ability to activate some magical items. Specific spells or knowledge of EarthMagic are not currently available to you, however choosing this skill area will add a bonus of one additional character point to your Intuition attribute. If you already have 5 character points ascribed to Intuition it is within the rules to increase this attribute to 6 points. In this case all intuition tests will automatically be successful. Although Lorecraft may seem somewhat underpowered, do not underestimate the advantages that may come from being able to sense EarthMagic.
Skill Bonus: +1 to Intuition Attribute.

Yours has been a hard life, one that has on more than one occasion required theft or deception to survive. Your Brigandry skills have been hard-won, and may prove useful to you yet again. Brigandry skills include an excellent local knowledge of the criminal elements of Northern Kalborea, forgery, disguise, lockpicking, pickpocketry and an extensive appreciation of traps and other lethal devices. Such skills carry no bonus to any of your character attributes, however they have kept you alive for many years and cannot be discounted if your are to succeed in your quest.
Skill Bonus: None.

Stealth is the stock-in-trade of the successful thief and you have been very successful in your time. This skill area includes knowledge of camouflage, silent movement, tactics and diversion methods, and a greater ability to use the Shimmera. Such are your skills in this area that if you choose Stealth you will receive one additional bonus point to your Shimmera total.
Skill Bonus: +1 to Shimmera.

Roll one die. This is the number of times during your quest that you may be able to use the uniquely Dwarvendim skill known as the 'Shimmera'. It is not magic by any means, but an illusion that has proven invaluable when in combat against large, powerful opponents. As it is an illusion, somewhat like a magician's sleight-of-hand, the circumstances for its use must be exactly right. This means that its use is somewhat limited, but can be very useful when the circumstances permit.
It is rumoured that the Shimmera takes advantage of a defect in the design of the Hordim, one specifically created to provide an edge in combat for the ancient Trell if ever they had a need to defend themselves from their own creations. As a technique it is known only to the Dwarvendim of the Stone Kingdoms. Long contact with the Hordim has shown this defect can be exploited, if the warrior using it has the intuition to judge its use correctly.
How it works is a matter of some discussion amongst scholars. The general agreement is that all Hordim have a small blindspot at the edge of their vision, one that tricks them into believing something moving quickly towards them and to the left has disappeared. For reasons that are not understood such a disappearance causes an overwhelming attack of vertigo in the creature, and allows an attacker one quick opportunity to deal a lethal blow. Experience has shown that the Shimmera only works against single opponents, and has no use against the beasts of the world or Dragons.
The Shimmera can only be used in two situations. The first is combat. To be able to use the Shimmera in combat you must be facing only a single opponent (the text will tell you when you may attempt to use this skill). Upon commencing the illusion you will disappear from the creature's view, and in the resulting incapacitating vertigo you will have your opportunity to finish the combat quickly.
The second situation where the Shimmera can be attempted is to aid escape from pursuing enemies. Although this skill does not work against groups of Hordim in the fashion of its design for combat, it does confuse small groups, especially in darkened areas. Use of the Shimmera against pursuers will allow escape but use of this skill under these circumstances is difficult. The text will tell you if it is an option you can use.
Please note that even though the Shimmera was designed by the Ancients as an advantage in combat, it did not save them from their ultimate fate at the hands of their creations. This failure is a testament to the limitations of this skill and its use should be confined to times of great desperation.
In this adventure any use of the Shimmera is preceded by an Intuition test. Such a test must be successful if the Shimmera is to be used. A failure has no detrimental effect, but the skill can only be attempted once in the combat. Each time you use the Shimmera you must record it on your status sheet. Remember that you can only use it during your quest the number of times indicated by your throw of the die, and only when the text gives you the option to use it.


Once you have determined your character attributes and chosen your character's specific Skill Areas, the next step in customising your character is to choose two talents. These talents enhance certain aspects of your character's ability to complete your quest and should be chosen carefully. It is not mandatory that you do so, but you may choose two of the following ten talents. Write the talents you have chosen into your character sheet, and if you wish write the specific nature of these talents into the Quest Notes section as a reminder.
1) Strong Back
A player with the talent of Strong Back may disregard all carry limitations. You may carry as many rations as you wish, and as many items of equipment or found objects as you think you need. Strong Back also allows an automatic success for any Strength attribute test required if you are trying to climb, or drag yourself, out of a hole or pit. There is one disadvantage to this talent. Once you have exceeded the normal carry limits a penalty of -1 to Agility and Combat Value applies.
2) Heroic Confidence
This talent is for all of us who enjoy charging into combat without thinking, only to discover their opponent more than a match for them. If you choose the talent of Heroic Confidence, you will obtain an advantage of +1 to your Combat Value purely due to your faith in your own abilities. This advantage lapses in each combat if you lose even one endurance point. A wound will automatically return your combat value to its normal level for the duration of that combat. Your next combat will find your heroic confidence once again restored.
3) Back to the Wall
A character who possesses the Back to the Wall talent will gain a temporary +1 advantage to their Combat Value if fighting any creature whilst trapped in a room or dead-end. If you are lucky enough to survive the combat, your Combat Value will return to its normal level once you have found a way out.
4) Beast Slayer
If you choose the Beast Slayer talent you will gain a +1 advantage to your Combat Value when fighting any creature other than Hordim or Man. Note that this talent cannot be chosen if you already have chosen the Sword Focus or Hordim Bane talents. Critical hit rules apply if you are facing any beast and have selected this talent.
5) Hordim Bane
An adventurer who possesses the Hordim Bane talent will enjoy a +2 increase to Combat Value during all combats with any creatures of the Horde. The cost of this advantage is the physical fatigue that will follow each combat. A -1 reduction to your Strength attribute applies once combat has ended until you have the opportunity to eat. A further reduction of 2 endurance points also applies until you can take food. This talent cannot be chosen if you intend to choose either the Beast Slayer or Sword Focus talents as well. Only one of these three talents can be used during any one adventure. Critical hit rules apply if you are facing any living Hordim and have selected this talent.
6) Leap of Fate
The Leap of Fate talent allows a player the opportunity to re-roll any three unsuccessful jumping attempts. This talent applies to any attribute test required as a part of a leap.
7) Skin of the Teeth
Choosing the Skin of the Teeth talent provides a player with the ability to survive a reduction of endurance points to zero or less. This talent allows you the opportunity to keep fighting after being reduced to zero in any combat, but for only as long as you win all further combat rounds in that fight. If an opponent can be defeated before your character is wounded any further you will survive, and be given 1 bonus endurance point to continue your quest.
8) Shadar in the Making
A Shadar in the Making exhibits unusual affinity to EarthMagic. This affinity is expressed in a heightened sense of intuition. This talent gives the player a +1 to their Intuition attribute and the ability to re-roll on any two failed intuition tests. If you already have 5 character points ascribed to your Intuition attribute it is within the rules to increase this attribute to 6 if you choose this talent. If this is the case all Intuition tests will automatically be successful and the ability to re-roll is not necessary.
9) Sword Focus
A Player who chooses Sword Focus will have a +1 increase to Combat Value for as long as they wield a sword. If at any time a sword is lost, or replaced with a more potent weapon, combat values must be returned to normal levels. Note: This talent cannot be chosen if you are intending to choose either Beast Slayer or Hordim Bane talents. Critical hit rules apply if you are facing any living foe other than Dragons and have selected this talent.
10) Blessed by Providence
If the talent of Blessed by Providence is chosen, a player may re-roll any two failed luck tests during the course of your adventure. This talent cannot be chosen if you intend to choose the Leap of Fate talent as well. Only one of these can be chosen at a time.
Once you have finalised your choices regarding character attributes, skills and talents you must then look to the completion of the remainder of the Character Status Sheet.

A large area of the character sheet has been allocated to the recording of equipment and items found. At this time this part of the sheet should be left blank. You will be given the opportunity during the adventure to choose the equipment you will be taking with you, and anything else you find on your quest will need to be accounted for here. Please note that at the beginning of your quest you will be given 50 additional character points that can be used to equip yourself for the adventure. This opportunity arises in the text of Section 1. Once you have acquired these items a carry limit does apply to any further items found or bought on your journey. Only 8 additional items may be carried at any one time. If you do find something and you are already at your carry limit, you will have to drop something else to keep it. This limit does not apply however, if you have chosen the Strong Back talent for your character. Under these circumstances there are no carry limits. Your character will suffer a -1 reduction to agility if the normal carry limits are exceeded though.
All the equipment items listed are extremely valuable to your task. Do not lose them. Other items of equipment may well become available to you as your journey progresses. If you find anything you should record it on your status sheet.

To begin your quest you will have in your possession enough food to last for 6 meals. This should be enough food for 3 days. These meals can be taken at any time (but not during combat) and each will restore 6 endurance points to your ongoing endurance level. There is a limit of one meal per section unless the text specifically allows you to. You cannot exceed your initial maximum endurance rating at any time during the game. There will be opportunities in the text to eat food found as your quest progresses. The text will tell you how such windfalls should be used.
The text may also suggest you eat a meal at certain points in the story. It is your choice whether you do or not. The following rule does apply in this situation however. Generally, these meal breaks are indicated because of the time of the day in the story, or because of the time that may have elapsed since your last meal. If you choose not to eat a meal then it means you will go hungry and two endurance points must be deducted from your endurance rating. If you do eat a meal then your endurance rating will be increased by the usual six points.
The rations that you have with you will need to be recorded properly on your status sheet. Each meal eaten should be noted on this sheet. Remember you may only carry a maximum of 6 rations at a time in your pack.

Nahla Bread is the essential backup food for any traveller crossing the wilds of Arborell. Light and nutritious, it provides a quick and effective meal for anyone who finds themselves far from habitation and fresh foods. A prudent traveller will take a supply of Nahla Bread with them on any long journey. Each bread will restore two endurance points when eaten, and the same rules apply as for rations concerning their use. Due to their light weight there is no limit to how much Nahla Bread can be carried.

In days long gone, the fortress of Stoneholme was the seat of power of the Stone Kings. Within its walls there are still many treasures scattered, hidden in secret rooms or discarded within long disused passages. If you find any of these artifacts, and you think they might be useful to you, take them and record them on your status sheet.

Each of the creatures that you encounter will have their own combat value and endurance level. The combat record sheet allows you to record these details in the boxes provided. This sheet should be printed out prior to starting your adventure. How you use these values is described in the following section on combat resolution.

Your quest to restore the pillar of stonewood will lead you into the depths of a chaotic realm. And there, alone, you will encounter the many creatures of the Horde. Stoneholme is now their dominion and they will protect it any way they can; no matter what the cost in their own lives. You will be attacked, and you will be forced to fight for your life. Combat must be conducted as follows;
|
Step 1:
|
Determine the creature's combat value and endurance points. Record these on your combat record sheet.
|
|
Step 2:
|
Roll two dice and add your combat value to the number thrown. This is your combat strength for the round.
|
|
Step 3:
|
Throw two dice and add the number rolled to your opponent's combat value. This is your adversary's combat strength for the round.
|
|
Step 4:
|
Compare both combat strengths. The higher combat strength wins the round, and an amount of endurance points must then be deducted from the loser's total endurance points. If the winner of the round has a combat strength four or more points higher than his opponent, he has struck a heavy blow and four endurance points must be taken. If the winner of the round wins by three points or less, the blow has been minor and only one endurance point can be taken from the loser's endurance points. If there has been a draw in the round there are no winners and the round must be repeated.
|
|
Step 5:
|
Repeat steps 2 to 4 for the next combat round. Combat continues in this way until either your endurance, or the endurance of your opponent falls to zero. At this point the combat has been resolved and one of you is dead.
|
Critical hits on double rolls of 5 and 6.
The rules above apply for all combats conducted within this quest, however for an adventurer that has chosen either the Weaponmastery skill or the Beast Slayer, Hordim Bane or Sword Focus talents a further rule applies. If at any time in the course of a combat you roll a double 5 or a double 6, and you possess any of the skills or talents mentioned, then you have rolled a critical hit and will have killed your opponent outright. This advantage applies to all combats for an adventurer who possesses Weaponmastery, except when fighting Dreyadim or Dragons. This advantage only applies if you otherwise have chosen Beast Slayer, Hordim Bane or Sword Focus when those talents would normally be useful to you. As an example, critical hits can only be made upon creatures of the world if you have Beast Slayer, only on Hordim if you have the Hordim Bane talent, or only while you are using a sword if you have Sword Focus (but as with Weaponmastery not when fighting Dreyadim or Dragons). If you have not chosen any of these skills or talents the critical hit rule does not apply.

There will be times during your quest that you will be asked to test your character's attributes. Whether it be strength, agility, intuition or just plain luck, you will be required to roll dice against them to determine success or failure in a particular activity. It is a straightforward test. If you are required to test against your strength for example, you will be required to roll two dice and then compare the number against your strength attribute. If the number you have rolled is the same or less than your strength points you have passed the test and can proceed according to the directions given. If you roll higher than your strength points you have failed the test and another set of directions will be given. All attributes except endurance can be tested, and apart from your strength attribute all other attributes are tested with a single die.

Windhammer is a large gamebook, one where there are many paths that can be taken, and many ways to come to an untimely end. To help players find a path through this adventure a number of simple rules have been developed so that progress can be saved.
There is no automatic save button or key built into this gamebook. If you wish to save your progress it will require that you print another character sheet and transcribe the information you have on your current character sheet over to the new one. A Saved Game Section box has been provided on the character sheet so that you can record the section you wish to restart from in the event that your character dies. You can save your progress in this manner as many times as you wish, it will simply require that you print a new character sheet for each. If you are using the text-based character sheet for visually impaired players this is an rtf document and therefore can be saved easily. You need only note the section number on this sheet before Saving As to a new document name.
With your character sheet determined you are now ready to continue on to the next stage of your preparation. Copies of the status sheet, combat record and Tak Lovar's map of Northern Kalborea are provided at the link on the contents page. As mentioned before, these sheets should be printed out, and in the case of the character status sheet completed prior to starting your journey.
In the accompanying pages you will find considerable information about your character, who the Dwarvendim are, and the reasons why you are about to undertake a most hazardous journey into the heart of a dark domain. Read these words carefully.
Although the nature of the Horde may at first be sketchy you will know as much as most adventurers do. For most of the peoples of Arborell, whether they be Dwarvendim, Kalborean, Faeyen or NomDruse, the Horde is the stuff of legend and myth, but now the Horde has returned and the worst nightmares of Men have come to reality. If the names Morg, Hresh, Mutan, Reaver or Jotun are unfamiliar do not be concerned, as a short introduction to these creatures is provided in the background section of this book. You will find as you progress through this adventure that they will indeed become all too familiar. Good luck.

|

This book, and its associated books and other documents in the Chronicles of Arborell series are the intellectual property of the author, Wayne F Densley, and all rights are reserved by him. Windhammer is best viewed at 1024 x 768 resolution. Any questions regarding the Chronicles of Arborell can be answered by emailing the author at densleyw@shoal.net.au
|
Windhammer, Copyright Wayne Densley 2008 All Rights Reserved
|
